
This tutorial covers the installation of Monowall (M0n0wall) onto a compact flash card utilizing a Mac and assembling the firewall. The firewall is being built utilizing an ALIX embedded system. This is the first part in a series of tutorials which will range from basic configuration of the firewall to more advanced topics such as IPSEC tunnels and VPN clients.
Download the Monowall embedded image file
Visit Monowall’s website and download the embedded image file for ALIX. Below is a link to the appropriate page.
Monowall Download Page: http://m0n0.ch/wall/beta.php
Place the file you just downloaded onto your desktop.
Monowall Download Page: http://m0n0.ch/wall/beta.php
Place the file you just downloaded onto your desktop.
Run Disk Utility
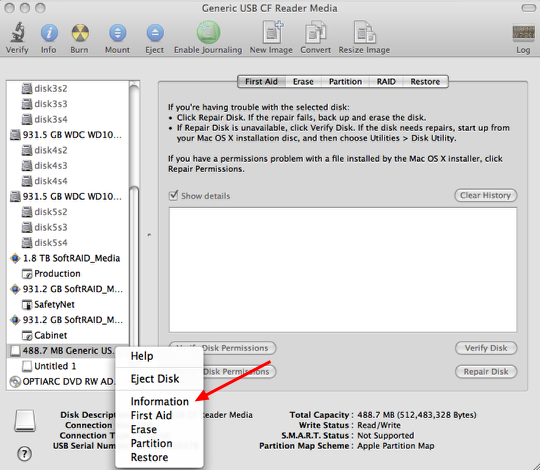
Insert a compact flash card into a card reader attached to your computer, a 256MB card will do just fine. Open up ‘Disk Utility’ which is located in the ‘Utilities’ folder under ‘Applications’ on your boot drive. Select the Compact Flash card you inserted on the right side. Make sure that you select the right drive, double check to make sure the size matches the card. Be very careful, if you select the wrong drive you could wipe all the information from a hard drive. Right-Click on the drive and select information.
Compact Flash Disk ID
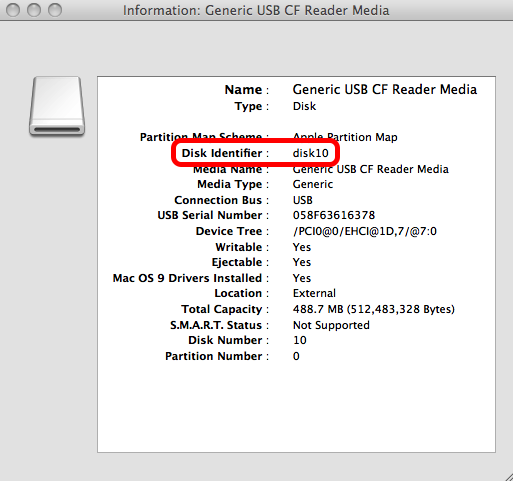
Jot down the the ‘Disk Identifier’ information associated with the drive. This number will vary on your own system so do not use the information listed above. Writing the wrong information down could result in one of your hard drives being wiped so pay very close attention. You will need this information for the next step.
Partition Mounted?
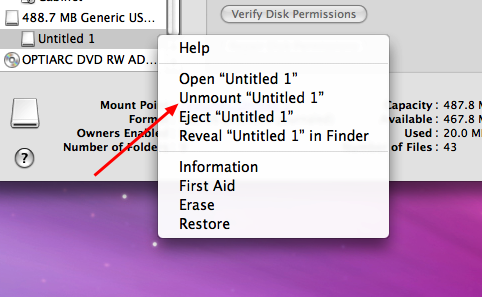
If there is a partition on the Compact Flash Card it needs to be unmounted. Right-Click on the partition listed underneath Compact Flash Card and select ‘Unmount’.
Run Terminal
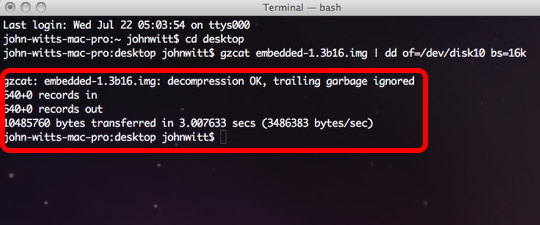
When you open Terminal it will default to your home directory. Issue the following commands to change to the desktop directory and write out the image file to the Compact Flash Card:
cd desktop
gzcat embedded-1.3b16.img | dd of=/dev/disk# bs=16k (Insert the Disk ID number that you jotted down from the previous step) Last warning if you enter the wrong information you could wipe a hard drive or other removable drive connected to your system)
You should receive a message as displayed above. If you receive a message that states the resource is busy, it means that you did not unmount a partition on the Compact Flash Card. Please go back to the previous step and unmount the partition.
Assemble the firewall

Remove the the Compact Flash Card from the card reader and insert it into the card slot on the ALIX board. Do this before you install it into the case as it will block the slot. This would also be good time to install any add in cards you might have into the mini-pci slots (wifi, vpn accelerator) Remove the hex bolts on both sides of the serial port, otherwise you cannot slip it into the case. Slide the board with the network ports going in first so they slide into the cutouts. With that inserted screw in the board to case, followed by reattaching the the hex bolts on the both sides of the serial port. Put the cover on the case and screw it in place. Thats all there is to it, pretty simple wouldn’t you say?
Log into the firewall
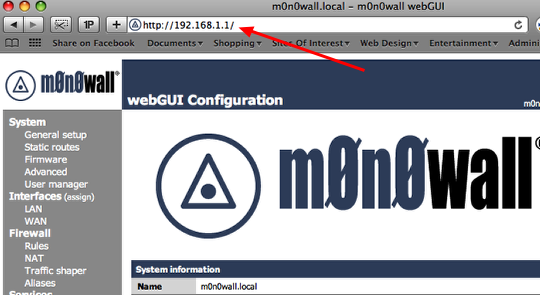
Plug your firewall into the network utilizing the LAN port and power up the unit. You can either plug the firewall into a switch or directly into your network port on your computer. The DHCP server on the firewall will supply your workstation with the appropriate IP address information. Give it a couple of minutes to finish booting up. Open up your favorite browser and type: http://192.168.1.1 into the address bar. This is the default address of the firewall. You will be prompted to login into the firewall, the following are the default credentials:
Username: admin
Password: mono
This information is case sensitive, make sure you enter everything in lower case.
That is it for the first part of the tutorial. The next tutorial will walk you through the basic configuration if the firewall. Subsequent tutorials will discuss more advanced features, such as creating tunnels between two remote firewalls.
